How to Draw an Easy Cartoon Bicycle
When it comes to exercise or even just spending a nice day outside, there are only so may places your legs can take you.
That is unless you have a bike, as this vehicle opens up many possibilities! Bikes can be used for sports, exercise or leisurely rides, and they can come in many varieties.
It can also be notoriously difficult to learn how to draw a cartoon bike, but that's what this guide is here for!
By the end of the steps in this guide, you will know exactly how it can be done while having a lot of fun.
This step-by-step guide on how to draw a cartoon bike in just 7 easy steps is here to show you how you can design your very own bike!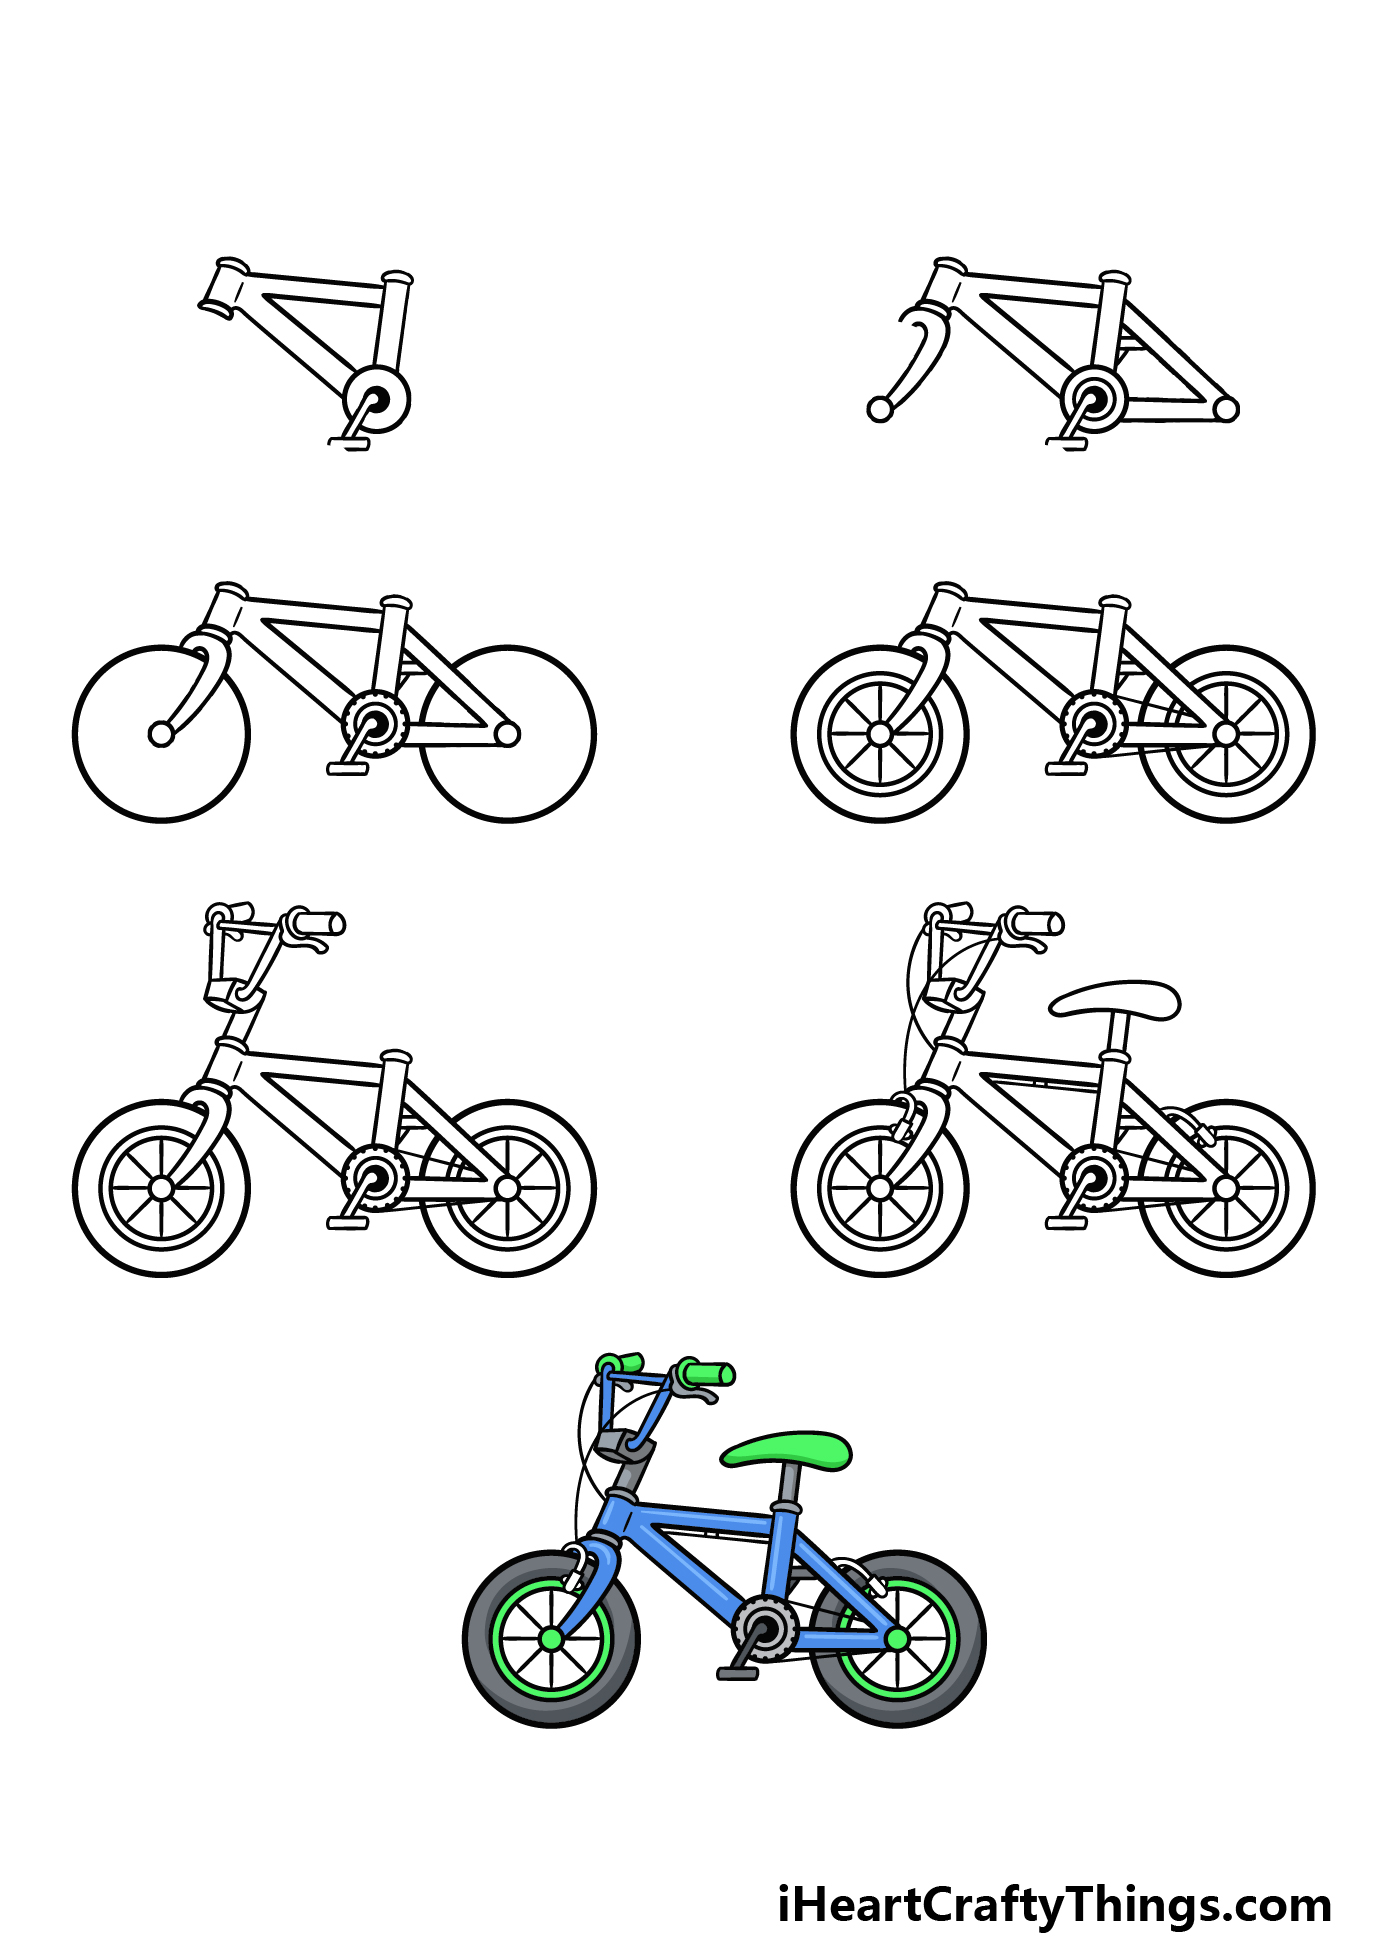
What's in this Blog Post
- How to Draw A Cartoon Bike – Let's Get Started!
- Step 1
- Step 2 – Draw some more of the frame
- Step 3 – Next, start drawing the wheels
- Step 4 – Now, draw some inner details for the wheels
- Step 5 – Draw the handlebars of your cartoon bike
- Step 6 – Now, add the final details
- Step 7 – Finish off your cartoon bike drawing with some color
- Your Cartoon Bike Drawing is Complete!
How to Draw A Cartoon Bike – Let's Get Started!
Step 1
To begin this guide on how to draw a cartoon bike, we will begin with the start of the frame as well as the pedal.
The frame is triangular in shape, and it is made up of two sections connected to one another. At the lower right-hand side, you will find the pedal for the bike.
This will have a round outline that the pedal itself is sticking out of at an angle.
While drawing the frame and other aspects of the bike, you can use a ruler to help you with some of the straight lines.
Step 2 – Draw some more of the frame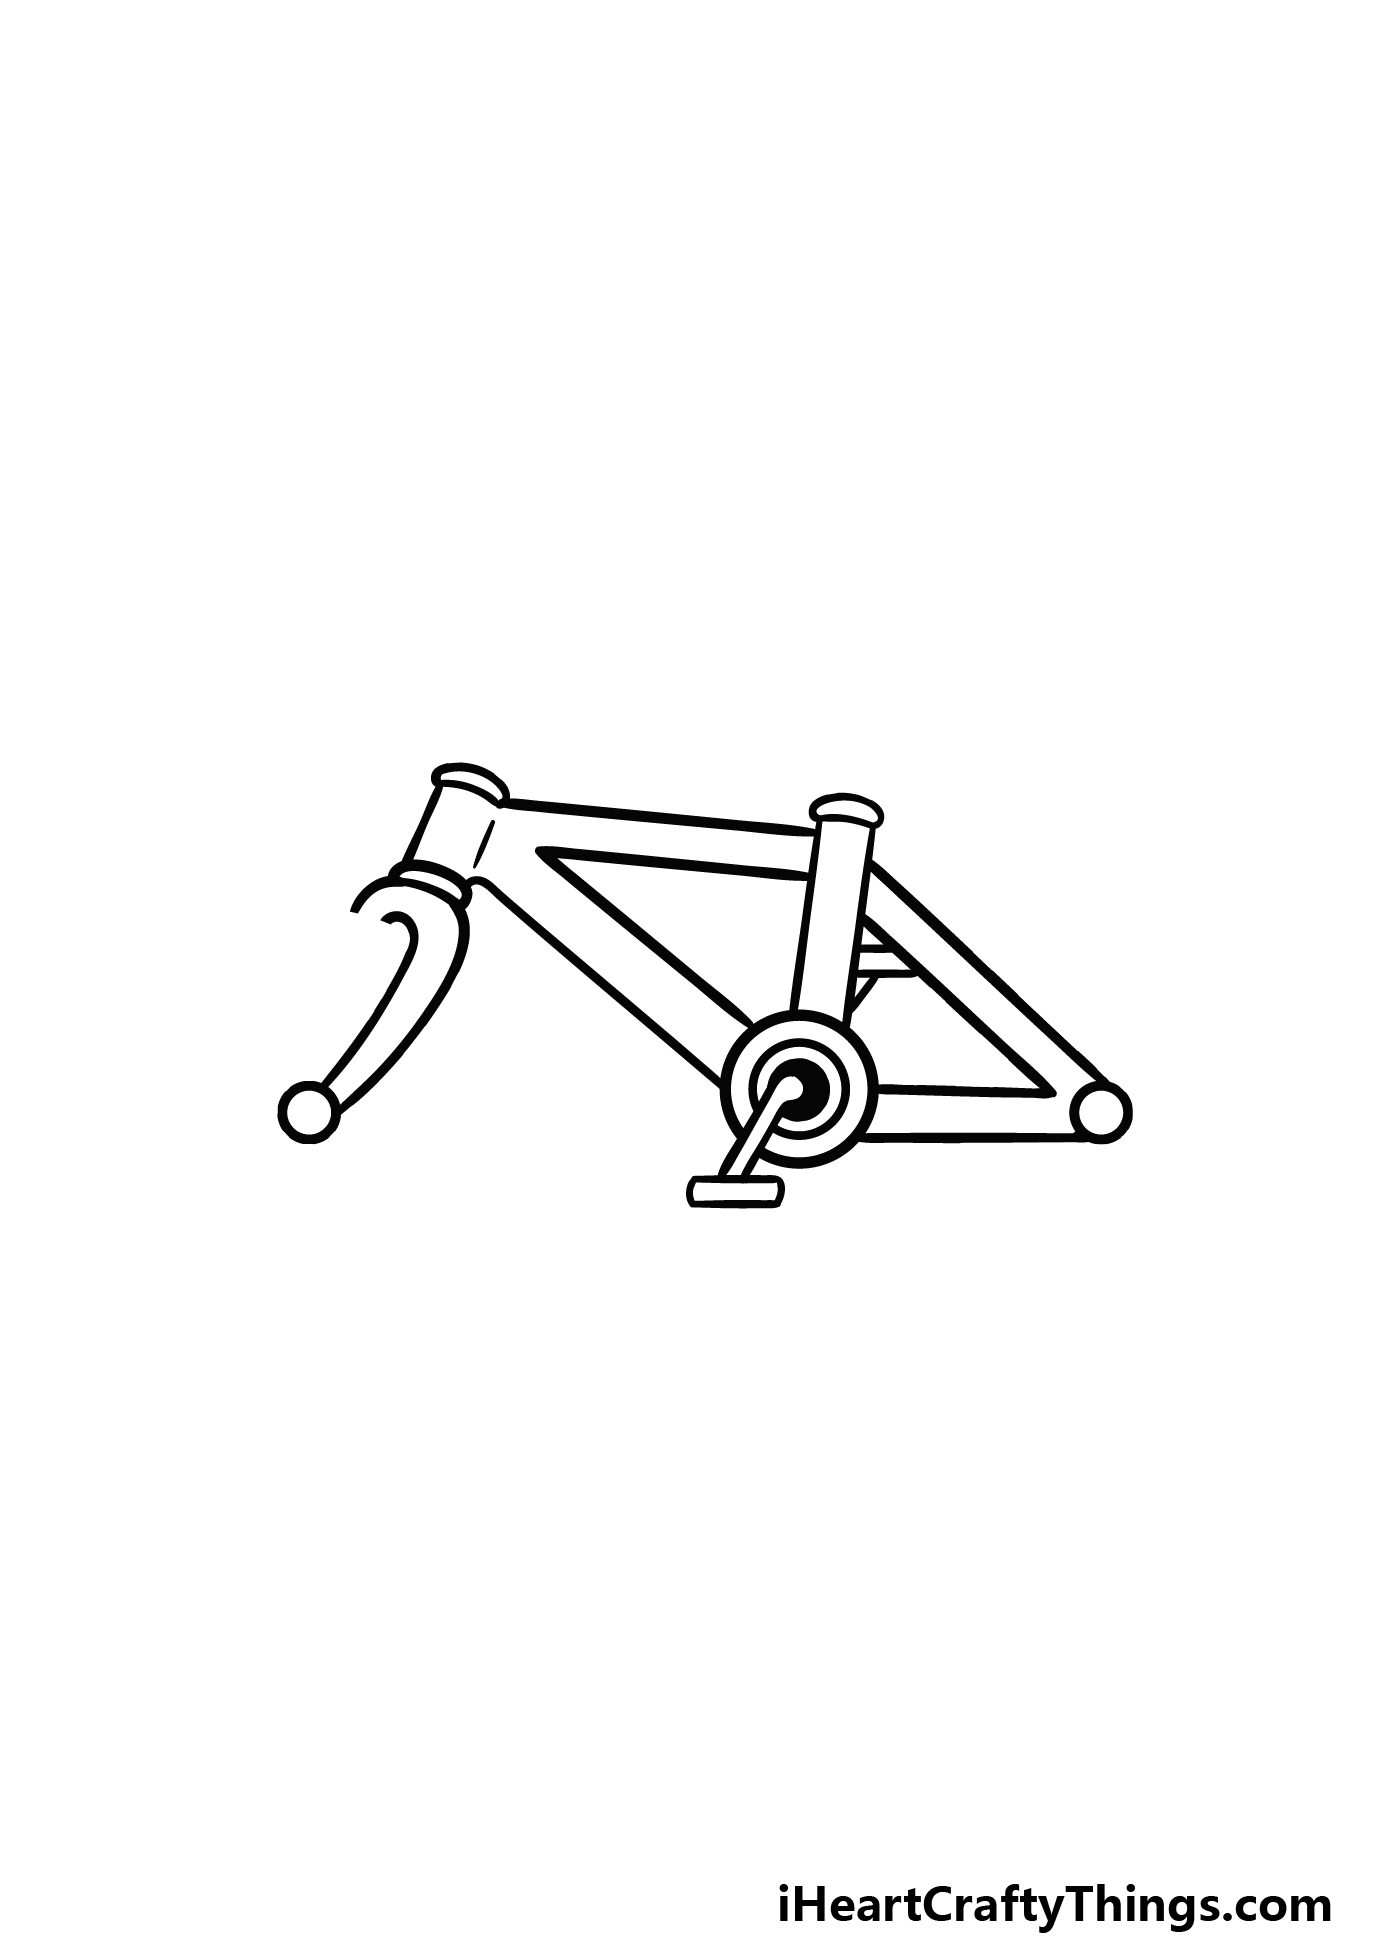
This step will be all about adding the next section of the frame for your cartoon bike drawing. First, we will add another triangular section to the right-hand side of the bike.
This will also have a small circle at the far right end.
Then, we will draw the first portion of the forked section that goes over the wheel attaching to the left-hand side of the frame you drew in the previous step.
Step 3 – Next, start drawing the wheels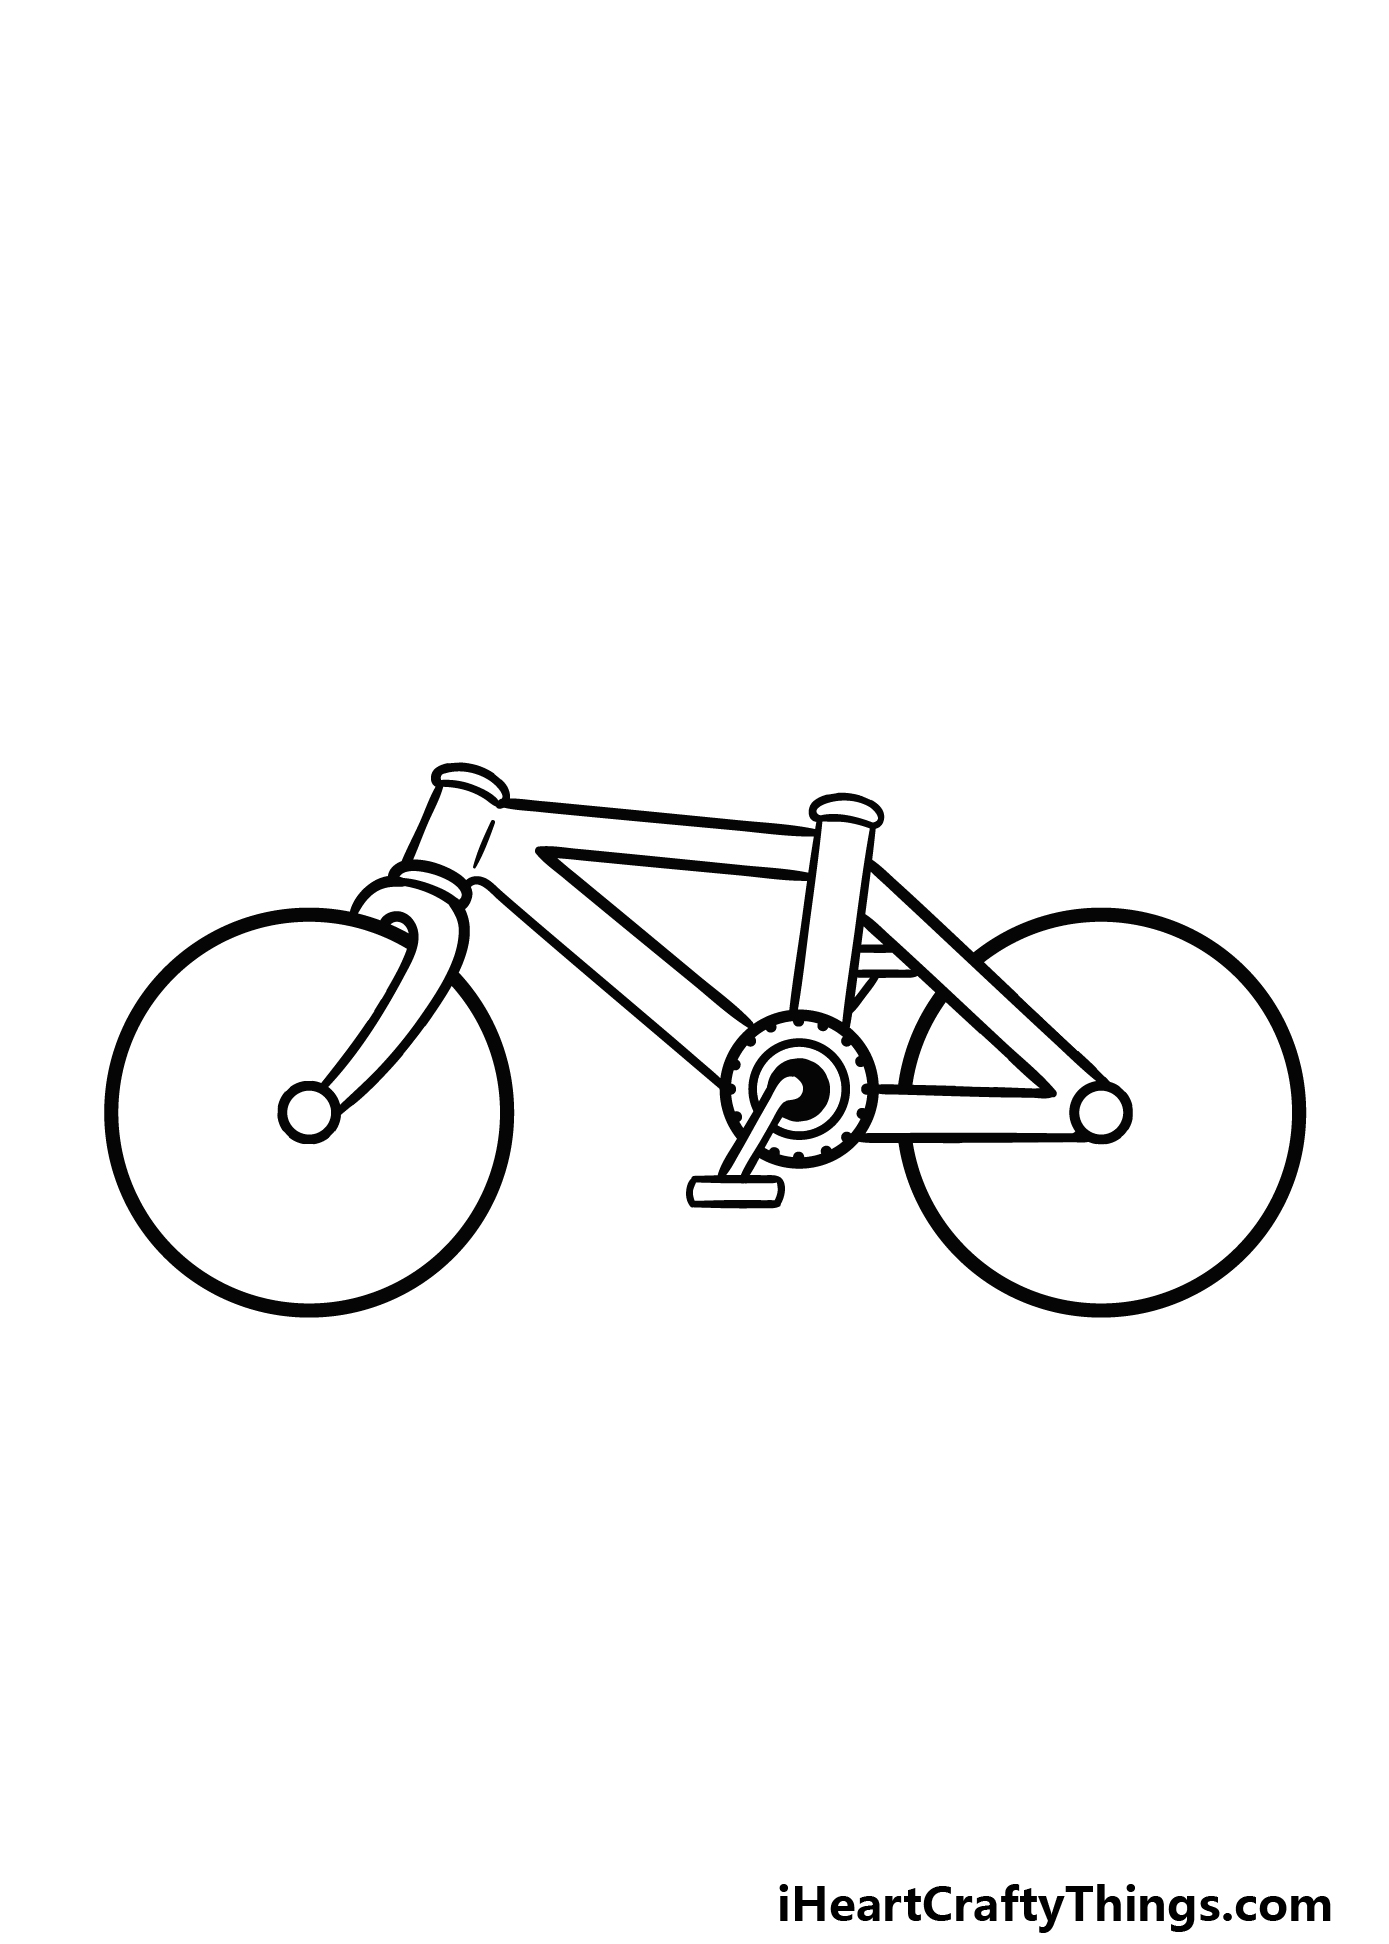
Now you're ready to start adding the wheels of this bike, as it wouldn't get very far without it! The wheels will be perfect circles.
And they will slot into the portions of the frame that we show in the reference image. You could use a drawing tool such as a drawing compass when drawing these circles.
We will also add more detail to these wheels shortly!
Finish off this step by adding some small dots to the round area of the pedal.
Step 4 – Now, draw some inner details for the wheels
We will be adding some inner details to the wheels of your cartoon bike drawing in this step. To begin this, we will first draw two smaller circles inside of the wheel outlines that you just drew.
The second one will go very close inside of the outline of the first one, which we show in our reference image.
Then, we will separate the inner circle into various segments, and this is another part where your ruler will come in handy!
Step 5 – Draw the handlebars of your cartoon bike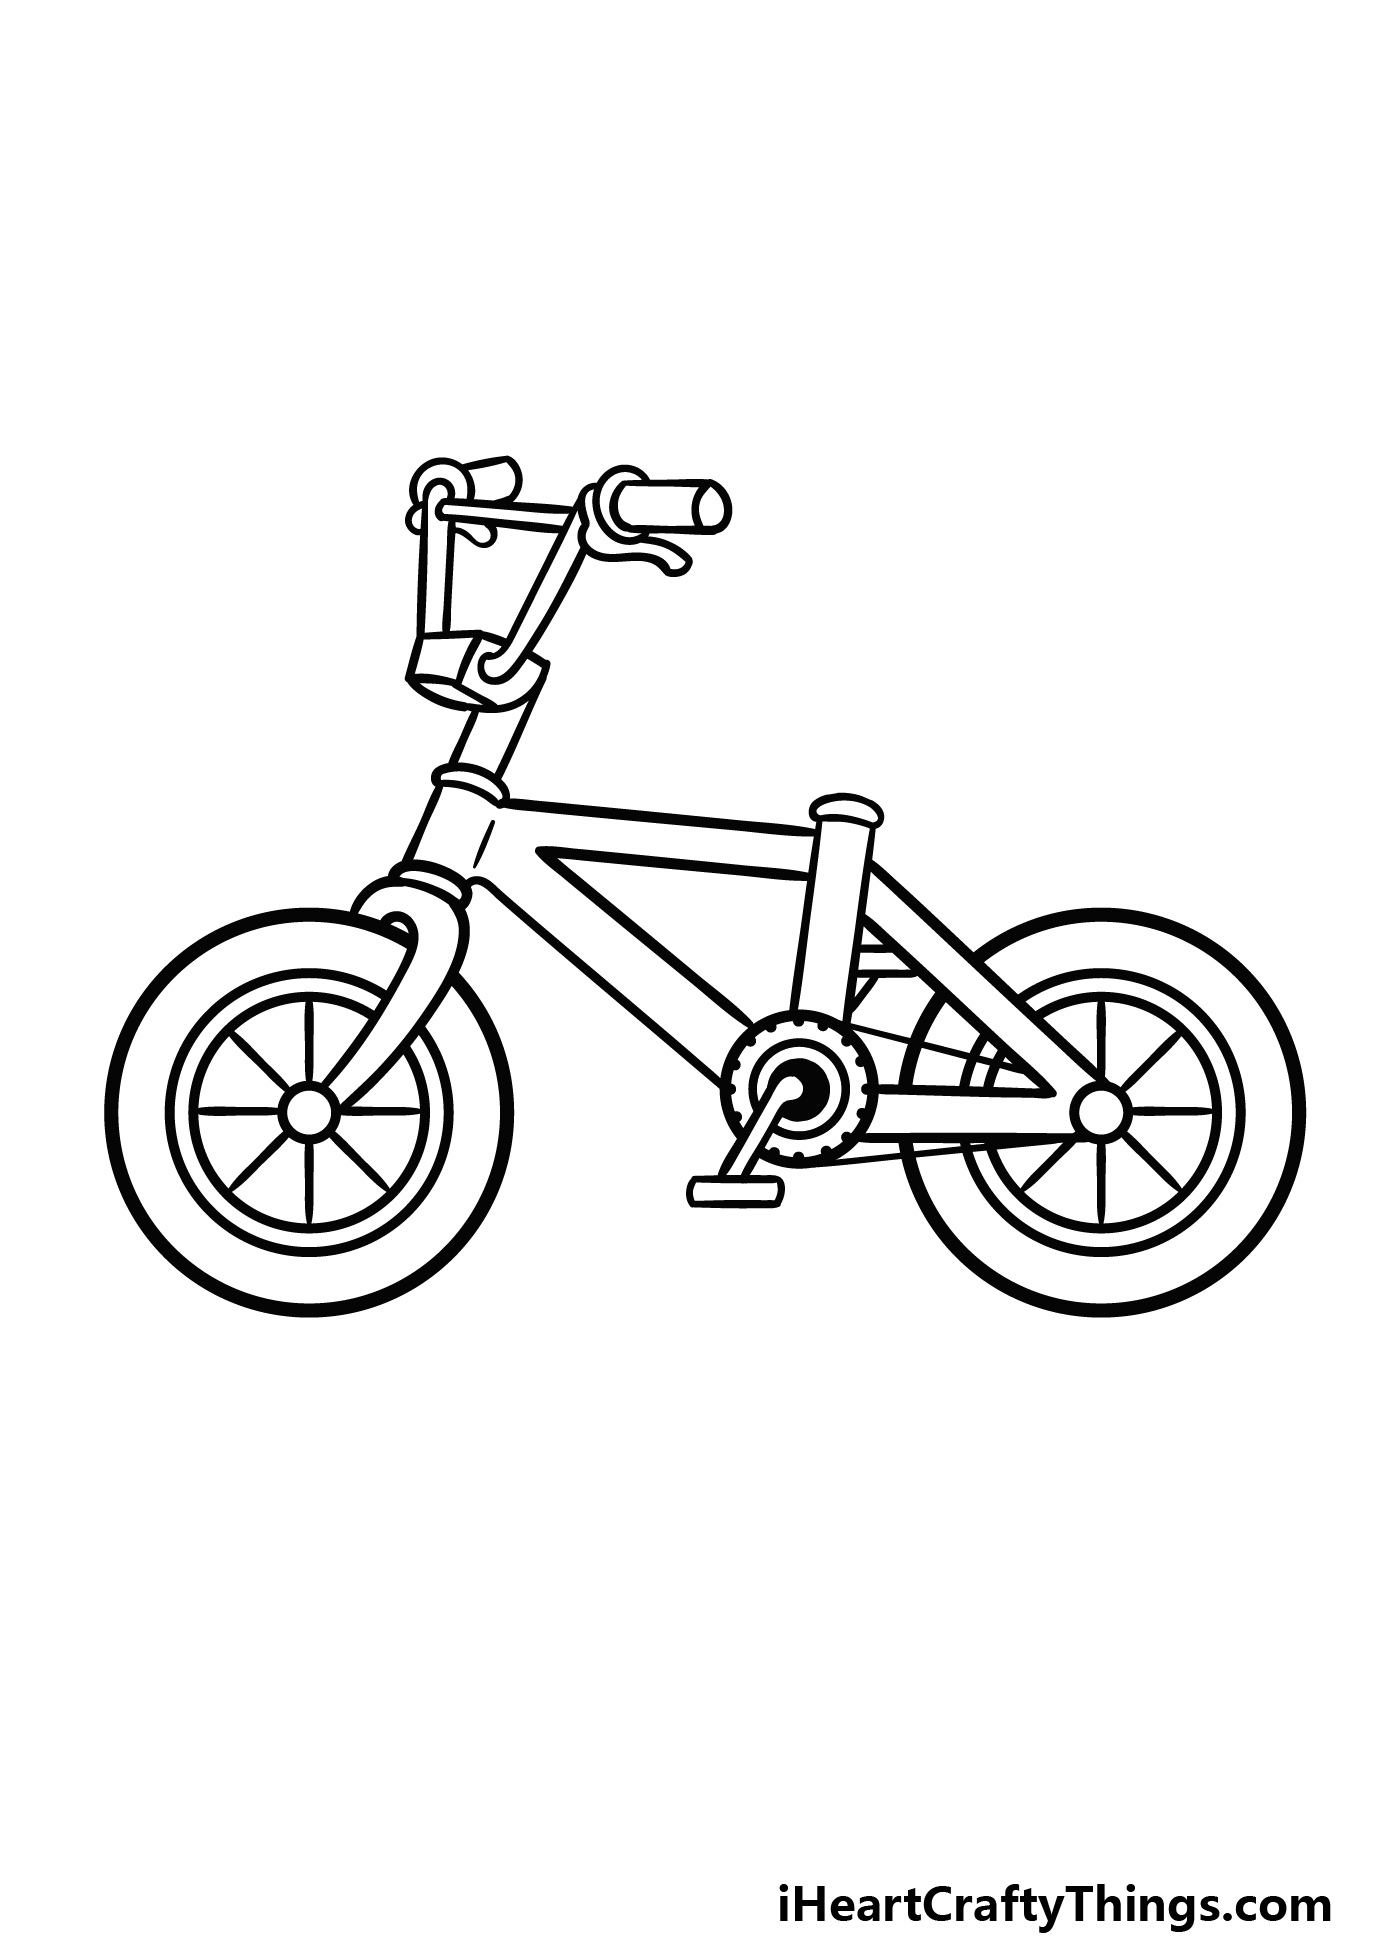
This step of our guide on how to draw a cartoon bike will be one of the trickier steps of the guide.
In this one, we will start drawing the handlebars of the bike, and there are quite a few fiddly details to draw for this part.
It will go onto the frame, and it will have some thin, straight sections for a frame of its own.
Then, you can add the handles and the brakes attached to them onto this frame. We would recommend closely following the reference image while taking your time with this one!
Then, we will add the final details in the next step.
Step 6 – Now, add the final details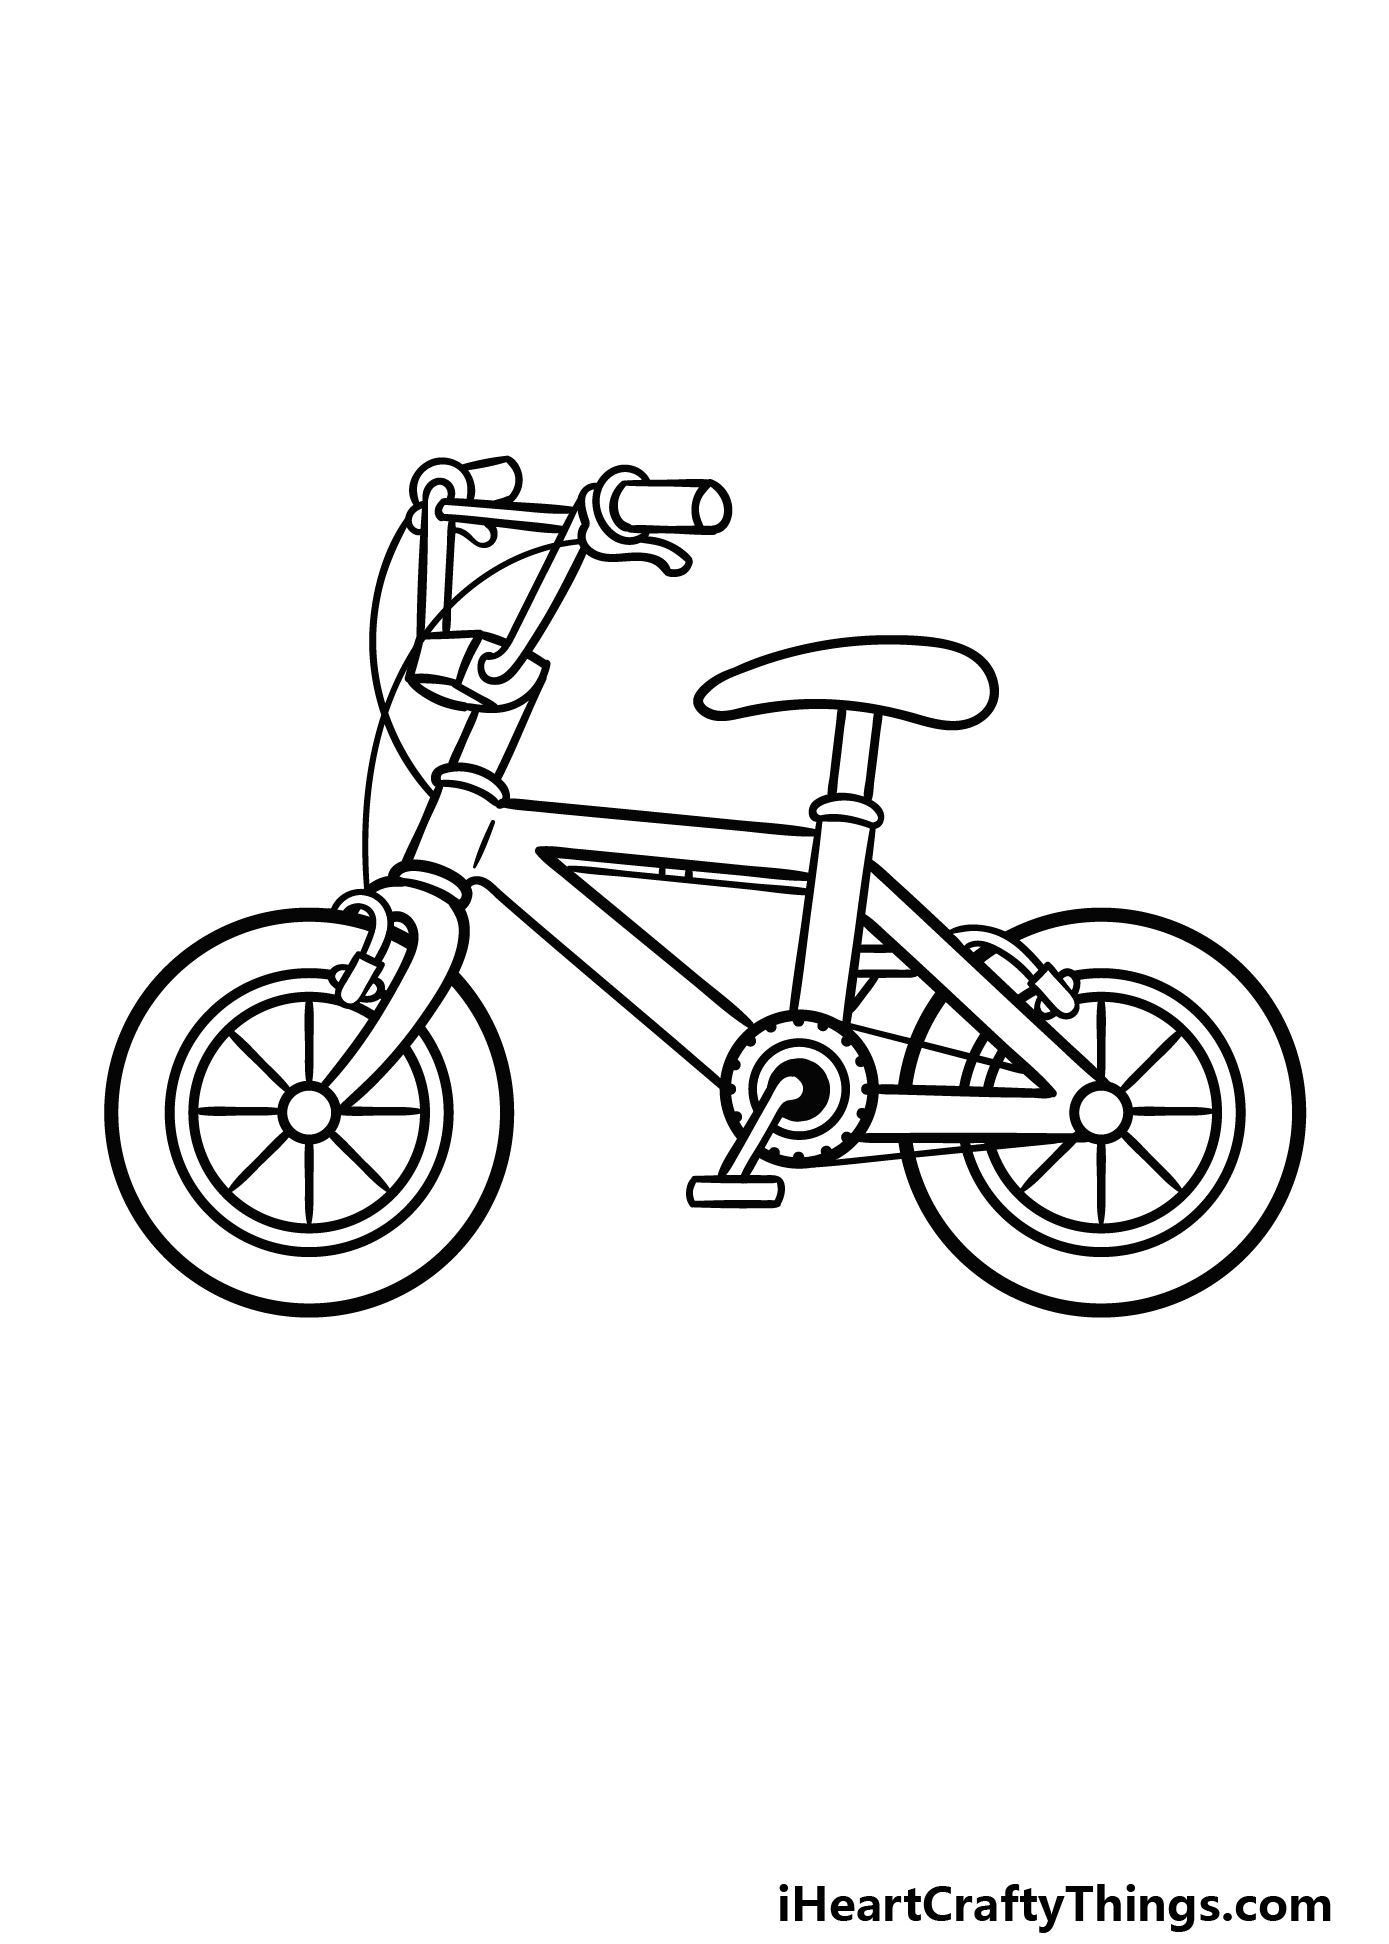
To finish off this drawing before we color it in the final step, we will have to add a few more details. First, we will add the bike seat.
This will be a flat, rounded shape that is thicker on the right than the left side. It will be attached to a thin piece of the frame.
Then, we will draw some thin wires coming down from the handlebars and just above the wheels. Finally, draw the curved brakes portions on top of the wheels to conclude the details for this step.
Before moving on, you could customize this bike by adding some additional details and ideas to the bike.
You could also draw a fun background to show where you would ride this bike. What else can you think of for this image?
Step 7 – Finish off your cartoon bike drawing with some color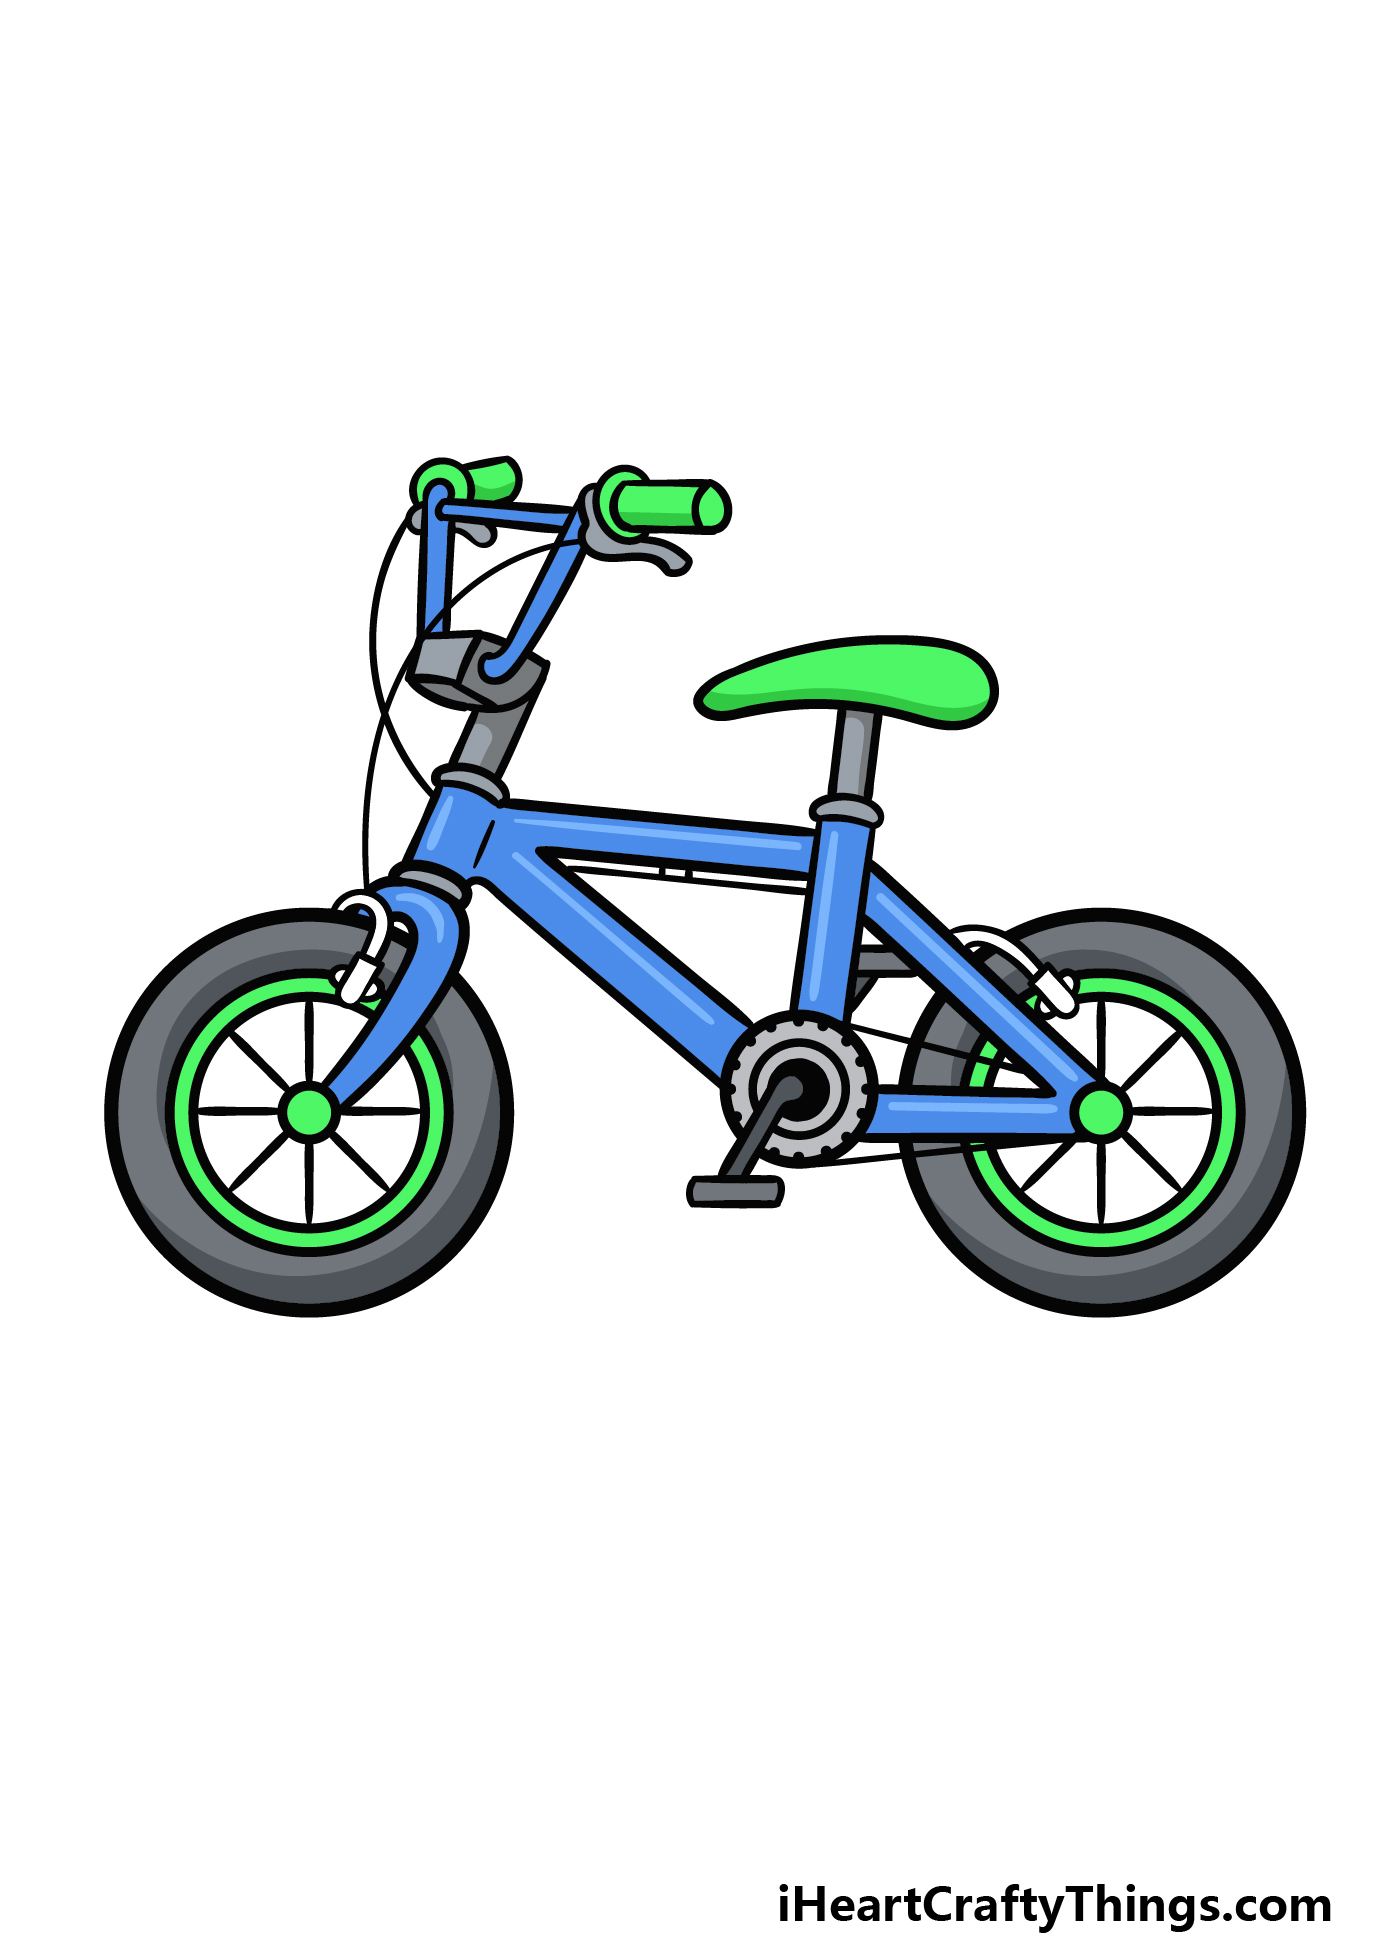
This is the final step of the guide, and in it we shall finish off with some awesome colors.
In our reference image, we used some bright blues for portions of the bike frame with greys for other portions. Then, we used greens for the handles, seat and inner tire details.
Bikes can come in any colors you can imagine, though, so you have loads of freedom with how you could color this in!
This is all about creating your own perfect bike, so you should feel free to use any colors you love to finish it off.
There are loads of small details to color in here, so we would recommend mediums that give you greater control such as colored pens or pencils. What will you use to color this cartoon bike?
Your Cartoon Bike Drawing is Complete!
We mentioned at the start of this guide on how to draw a cartoon bike that drawing bikes is not always an easy task!
This guide was designed to show you that it can be really fun and easy when you break it down, and this is always the best way to conquer a drawing challenge.
Remember to customize the details of this bike and add any extra elements that you may want for it! There are so many ways that you could complete this bike, so let your creativity flow.
If you enjoyed working on this guide, you'll be glad to know we have many more for you to enjoy on our website! Be sure to check in there often to never miss out.
When you're ready to show off your finished cartoon bike drawing, you can share it on our Facebook and Pinterest pages!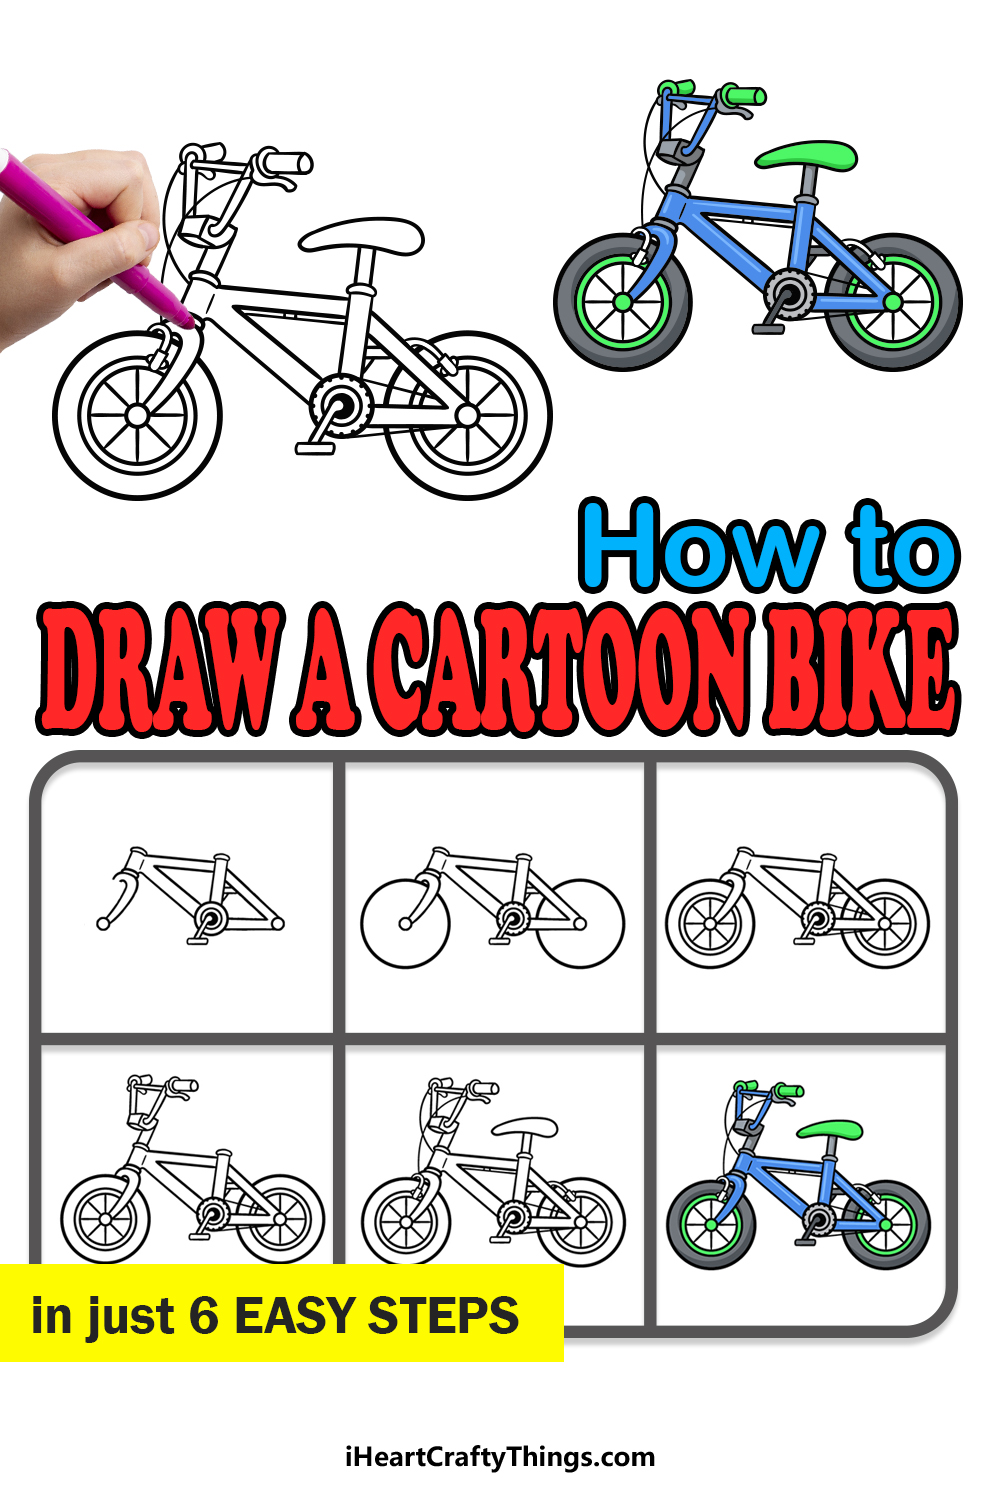
Source: https://iheartcraftythings.com/cartoon-bike-drawing.html
Enviar um comentário for "How to Draw an Easy Cartoon Bicycle"